Pickeled Tink, Saddle Bags Are Done(Happy mothers day ladies) < threw that in for good measure.
Here it is at two o'clock in the morning and I'm finally done with the bags. All mounted up and ready to go. Although the foam seals could use replacing on the tops but they should suffice for now. My wife with her steady hand at painting volunteered to paint the little edges of the reflectors for me. The finish has worn off in time on them so some Testors model car paint will take care of that easy enough, I'd botch that up.
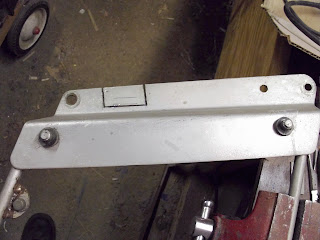
Rather than remove my extra tail/turn signal lights I opted to cut a notch in the heavy steel brackets to fit around them. Needless to say but I was a tad apprehensive on doing it. So as Hugh over at Hugh's hand built says "I eyecalipered them" before making my cuts, marking the cut lines with pencil. Then I took the grinder/cutoff tool and cut the first cuts and then finished them off with the Dremel and metal cutting wheel. I got the little Dremel cutting wheels for my Birthday and gotta say they work great. I've been using them on several metal fab projects. I cleaned up the cuts with a file of course, don't be wanting any sharp edges.

From left, Chicago Grinder/cutting tool, Pencil, file and Dremel with cutting wheel attachment. Oh! and the little chunk I cut out to make the slot.
Here is the bracket with the slotted piece just about ready to pop off. I forgot to get a picture of it after the slot was finished. Everything was going to well and I just kept proceeding along.
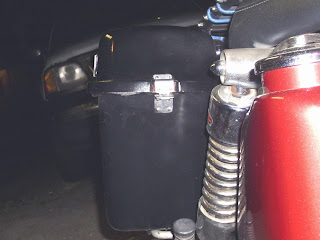
Right side saddle bag mounted up on Rat Bastard
Another shot of the right side. You can't even see the repaired cracks.
Both bags mounted up solid on Rat Bastard and with the cross brace in place too. The left side top needs the foam seal worse than the right side does and because of this the top has some very slight movement. The brackets could use a bit of twisting adjustment to set straighter. This whole set came from an injured Ironhead found in a barn at an estate sale/auction with a load of extra parts. There were so many extra parts the buyer had enough to build two almost complete bikes in addition to the complete one.
Left side saddle bag. This one was busted front and back plus some cracks in the sides. I'm very pleased how both these bags came out. And the price was right on them.
Here is the front of the right side bag. These night time pictures do no justice here. I'm confident in the repairs and the process now that I'm ready to tackle anyone else's broken saddle bags, and fairings or other ABS plastic motorcycle parts for that matter. It was definitely a learning experience and a different one from the fiberglass repair I'm used to. With this process I can make some cool one off parts in the future. Already thinking about some of those.
Well there it is, satisfaction and ready for the road trip. I guess you could say...I'm just pickeled tink about the whole thing. Happy Mothers day, as it is now, to all the Mothers out there.


4 comments:
Dude, I am so jealous...
Looking good there Wooley. They look like they came right out of the dealership.
Appreciate it Bully and Kernel Clink. Had a good time doing it mostly. Now I don't have to hesitate if I find another pair that needs repairing, If I have the funds that is. hahaha. Trying to keep funds for now for the ride.
I could have done better but I was hurrying it along. If you find a set that needs work I can fix 'em for ya now, glass or plastic.
Don’t paint them! They look damn good just the way they are.
Post a Comment